


Overview
Every annotation object you add to a markup can be edited and updated. Once added select the object to rotate, scale, move and delete. Any action can be undone/redone up to 10 times using the undo and redo buttons. For text, rectangle and oval tools notice the toggle below the object when it's selected to change the background fill on/off.
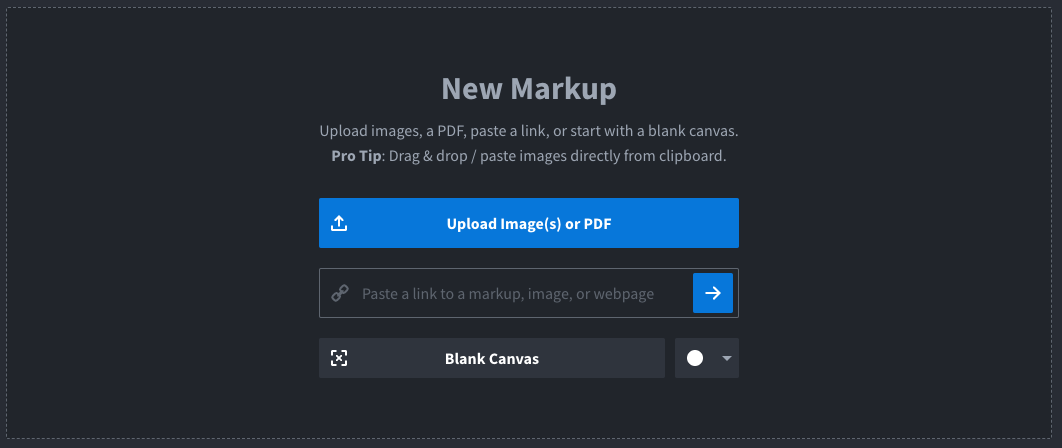
Start with a screenshot (Desktop App or Chrome Extension), or upload an image or PDF, or even a blank canvas 👇.

Text
Add text by clicking the text button. When the text box is selected you can toggle the background on (default) or off. Change the color using the color dropdown. Change the size using the default font size dropdown (just to the right of the color dropdown with options XS, SM, MD, LG, XL, and XXL). Move, scale and rotate the text as needed. Delete the text box by selecting it and hitting delete.

Add Links & URLs to any text box. Then long press or right click on the text box to open the URL(s) in a new tab. Any viewer of the markup can click on the text box and either open the URL(s) in a new tab or even copy all the text to your clipboard.
Anyone can Copy Text from your text box annotations. As a markup owner long press or right click on the text box to open the context menu. As a markup viewer simply click on the text box to open the context menu and select Copy Text.
Arrow & Line
Add arrows and lines by clicking the respective arrow and line buttons. Change the color using the color dropdown. Change the line thickness by using the line thickness dropdown (just to the right of the color dropdown with options XS, SM, MD, LG, XL, and XXL).

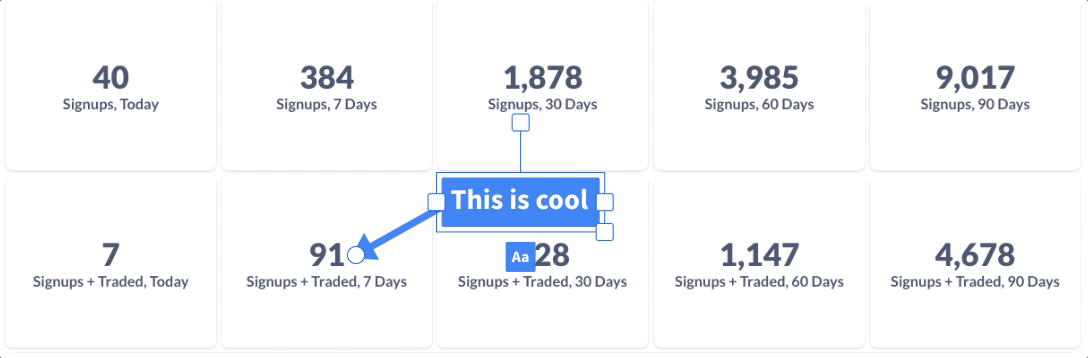
Callout Arrow
Add arrows with a text box attached by clicking the callout arrow button. Change the color using the color dropdown. Change the size using the default line thickness / font size dropdown (just to the right of the color dropdown with options XS, SM, MD, LG, XL, and XXL). Move, scale and rotate the arrow & text as needed. Delete the text box by selecting it and hitting delete.
Pro Tip

Select any Textbox or Callout Arrow Textbox and double click the left side or right side transformer box to automatically fit the textbox width to the text.
Rectangle & Oval
Add rectangles and ovals by clicking the respective rectangle & oval buttons. When the rectangle or oval is selected you can toggle the object to be outlined (default) or filled. Change the color using the color dropdown. Change the line thickness by using the line thickness dropdown (just to the right of the color dropdown with options XS, SM, MD, LG, XL, and XXL).

Blur
Blur parts of your markup to obfuscate sensitive information. To add a blur select the blur tool, select your desired area on the canvas, then click the "Apply Blur" button to permanently blur the area. Please note once you have applied the blur you can't undo it. We flatten the blur into the markup file so it's secure and can't be edited.
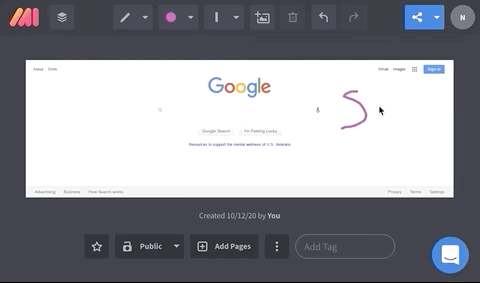
Pen & Highlighter
Add drawings and highlight text by using the pen and highlighter tool. Hold SHIFT while drawing with the Pen or Highlighter tool to make a straight line. Change the color using the color dropdown. Change the line thickness by using the line thickness dropdown (just to the right of the color dropdown with options XS, SM, MD, LG, XL, and XXL).
Color
Change the color of any object by using the color dropdown.
Font Size / Line Thickness
Change the default font size or line thickness by using the font size / line thickness dropdown (just to the right of the color dropdown with options XS, SM, MD, LG, XL, and XXL).
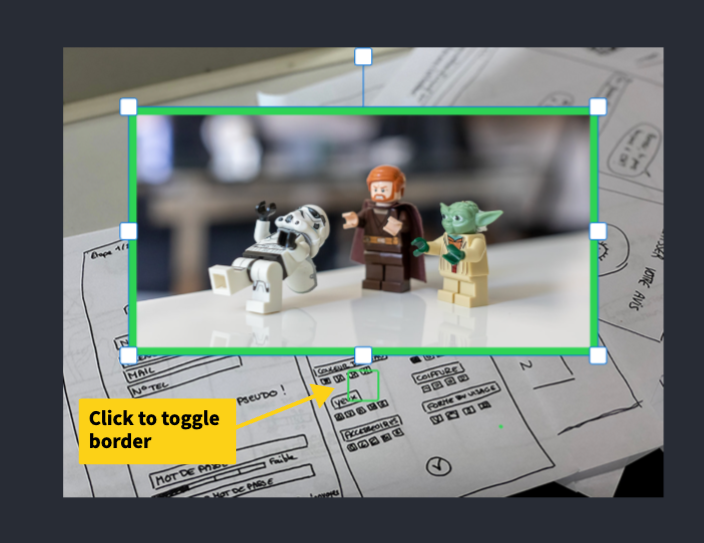
Insert Image
Insert any JPG, PNG, or even an SVG icon by pasting from your clipboard, dragging the file onto the canvas from your finder or by clicking on the insert image button. Reposition, scale and rotate the image or icon as needed on the markup.
Note: Toggle a color border around your image by clicking the square below the image (see screenshot 👇)
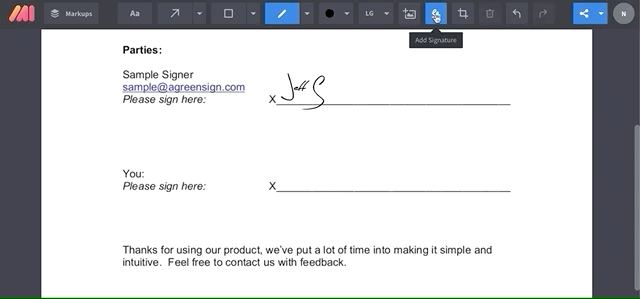
Add Signature
Click the "Add Signature" button, type your name and select your signature to sign the document. Change the color using the color dropdown. Reposition, scale and rotate the signature as needed on the markup.
Crop / Expand Canvas
Click the crop canvas tool and adjust the selected area to your desired display. Crop the canvas to display what's most important or even expand the crop past the original dimensions to create extra white space for your annotations.
Rotate Canvas
Click the rotate canvas tool to rotate the canvas 90 degrees.
Multiselect Objects on Canvas
Click the multiselect tool or press and hold shift. Drag and select multiple objects then bulk edit position, rotation, color, font size and line thickness all at once. You can even cut ctrl x, copy ctrl c, and paste ctrl v with the Multiselect tool.
Undo / Redo
Undo or redo any action for up to 10 actions by using the undo / redo buttons.
Delete Object
Delete any annotation object by selecting it and hitting the delete button.
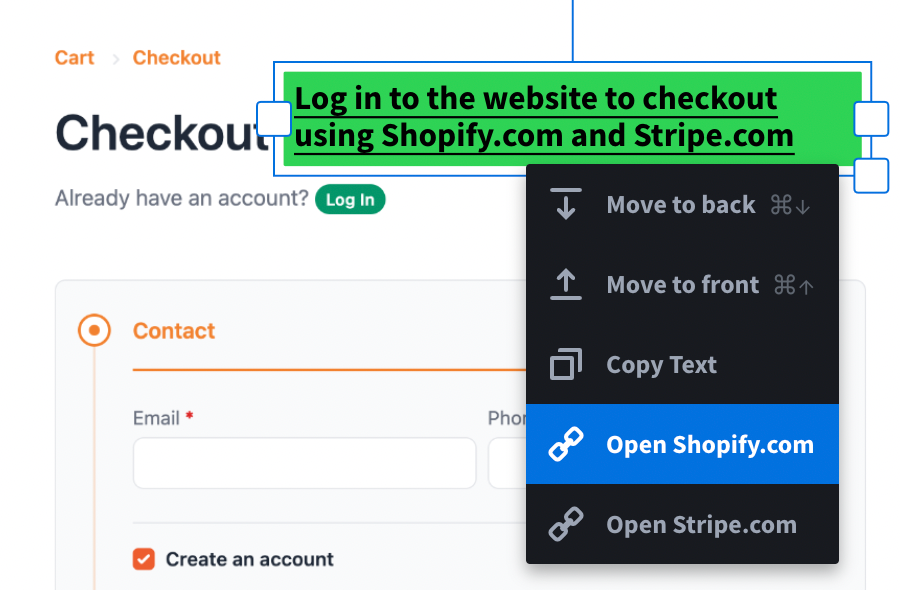
Change Layer Order
Change the layer order of any annotation object you add to a markup with new context menu. Right click (or on touch devices long press) on any annotation object and select "Send to back" or "Send to front" to change the layer order of that object.
Nudge Object
Nudge / move objects up, down, left and right by 1px when selected using your arrow keys to get them to just the right place and make your annotations look pro! Hold shift + up, down, left or right to move objects by 5px.
Cut, Copy & Paste Objects
Select an object and use cmd X, cmd C, and cmd V to cut, copy, & paste that object on any markup page or even across different markups.